http://dbd.game/killswitch
[Chapter Concept] - DOOM
This is not a testament to The Doom Slayer. If anything, he should terrify The Entity. No, there is another like him, but not nearly as powerful, not nearly as much of a… threat to The Entity.
But first, we must see the new culling grounds…
SENTINEL PRIME - ARGENT D'NUR
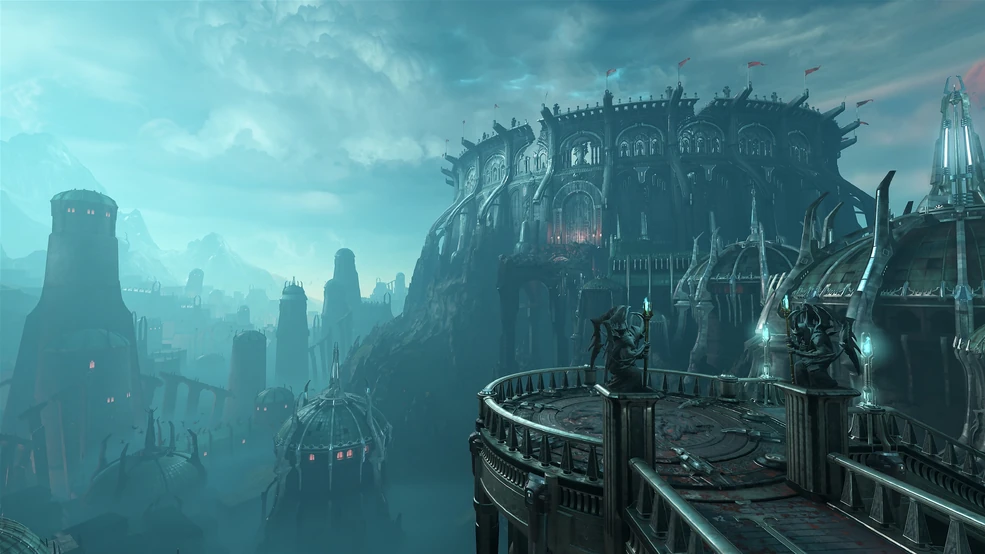
A dead realm once inhabited by Argentans and Sentinels, now a conquered and pillaged place, only containing the forces of Hell. Some of the location has even been consumed and fallen into Hell itself. Now rebuilt in the Realm of The Entity, its Hellish and Holy natures clash together from the memories of Olivia Pierce and the former Knight Sentinel who once called this place home, Lord Raimond.
Offering: Slayer Token
A token bearing the sigil of The Doom Slayer, the most feared man in all of Hell.
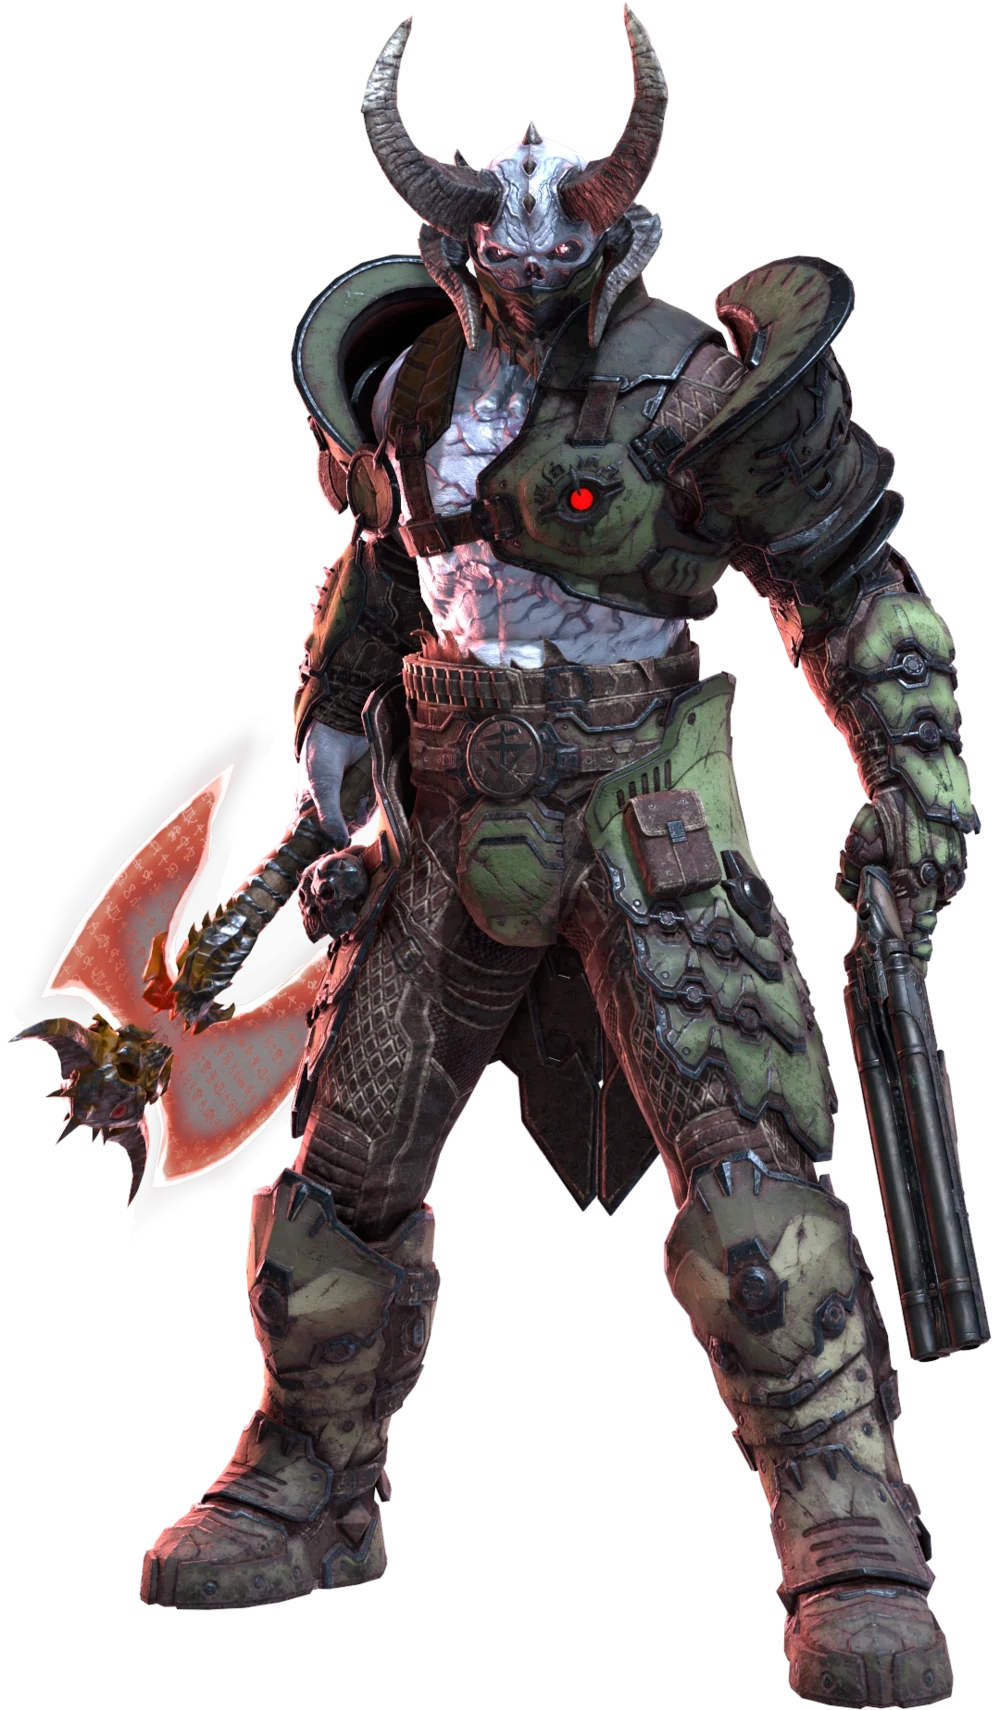
THE MARAUDER - LORD RAIMOND
A Killer who's more of a monster than a man, The Marauder is capable of adapting to the situation from within Night Sentinel Stance.
His personal Perks Scourge Hook: Unholy, Hex: Argent, and Demonic Presence allow you to Enflame Totems that break Survivors, accelerate the Sacrifice Process, and extend the amount needed to Repair regressing Generators.
Slay the usurpers.
SPECIAL STANCE: KNIGHT SENTINEL STANCE
Pressing the Power button has The Marauder enter Night Sentinel Stance.
The only way to exit this stance is by either attacking, running out of Stamina, or pressing the Drop button.
All attacks within Night Sentinel Stance are counted as Special Attacks and require Stamina to perform.
The Power Gauge represents The Hell Wolf.
From within Night Sentinel Stance, you can perform the following attacks:
- Overhead
- Sweep
- Shield Crash
- Beam
Pressing the Attack button during Night Sentinel Stance causes you to perform an Overhead attack.
Turning is difficult during the Overhead, but can destroy Pallets and Breakable Walls.
Destroying an Object with the Overhead ends Night Sentinel Stance.
Pressing the Alternate Ability button during Night Sentinel Stance causes you to perform a sweeping attack.
The Sweep damages every Survivor in front of you, but has a high chance of hitting an object in the environment, ending Night Sentinel Stance.
Pressing the Power button during Night Sentinel Stance causes you to dash forward with your Shield out.
The Shield Crash moves you forward and, upon colliding with a Survivor, shoves them forward.
If they collide with a wall or another Survivor, they become stunned for a short duration. However, the Shield Crash is the slowest action in Night Sentinel Stance to come out and can't be Feinted.
Pressing the Interaction button during Night Sentinel Stance sends out a vertical beam of energy that damages Survivors.
The Beam can get sliced off if it hits objects during its flight and fully dissipates upon hitting a Survivor.
PASSIVE ABILITY: FEINT
During Night Sentinel Stance, pressing any other button while performing a different attack causes you to Feint the former and proceed with the new attack.
You cannot Feint into the same attack nor can you Feint a Shield Crash. Feinting an attack drains more Stamina than releasing a normal attack from Night Sentinel Stance.
PASSIVE ABILITY: STAMINA
Above the Power and Add-Ons is a green bar that represents The Marauder's Stamina.
Performing attacks and Feints from within Night Sentinel Stance drains the Stamina. If the Stamina bar runs out, it goes gray and slowly refills, disallowing you to re-enter Night Sentinel Stance as well as pulling you out of it until it refills and turns green.
If you run out of Stamina during an attack, then the attack will go through, but you will be unable to feint it.
SPECIAL ABILITY: HELL WOLF
When the Power Gauge is full, you can send out The Hell Wolf by pressing the Alternate Ability button outside of Night Sentinel Stance. The Hell Wolf will roam a Trial and, upon finding a Survivor, will howl and reveal them via Killer Instinct for 6 seconds.
When The Hell Wolf howls, it leaves the Power Gauge at exactly where it was when The Hell Wolf spotted a Survivor.
After The Hell Wolf is done howling, it will lunge at the Survivor, possibly injuring them. If the attack connects, The Hell Wolf's Power Gauge is fully depleted.
The Hell Wolf will never target the Survivor you're currently chasing. Upon the Power Gauge ending, The Hell Wolf leaves the Trial.
Cooldown of 80 seconds if fully depleted.
The Hell Wolf will roam for 30 seconds.
"You were never one of us. You were nothing but a usurper. A false idol. My eyes have been opened. Let me help you to see, Slayer." - The Marauder
SCOURGE HOOK: UNHOLY
Turns 4 Hooks in the environment into Scourge Hooks.
Hooking a Survivor on a Scourge Hook creates an Enflamed Totem within the Trial.
While an Enflamed Totem is present, all injured Survivors become Broken and all Skill Checks become 50/75/100% faster.
The Enflamed Totem takes 6 seconds to Extinguish and takes the place of a pre-existing Totem. When a Survivor performs the Extinguish action, it does not destroy the Totem and reverts it to whatever type it was before it became Enflamed.
When a Survivor is unhooked from the Scourge Hook, it no longer becomes a Scourge Hook unless you have other Scourge Hook Perks, but even so, Scourge Hook: Unholy is disabled on said Hook.
Survivors cannot Bless an Enflamed Totem.
"I thought you would appreciate the sentry I chose. The great Agaddon Hunters from the Telos Realm, though long thought to be extinct, created to hunt only the Slayer and his Night Sentinels during the Unholy Crusade... Some improvements on the design have been made; enjoy what is undoubtedly my finest work." -Deag Ranak
HEX: ARGENT
Hooking every Survivor once turns a Dull Totem into a Hex Totem, if possible.
While Hex: Argent is active, the Sacrifice Process is accelerated by 30/40/50%
If the Survivor is on a Scourge Hook, the values are increased by 50/75/100%
Effects end once the associated Hex Totem is destroyed. This Hex cannot come back by any means once it is destroyed.
"The demons only utilize a portion of the resources that come from the human soul. It was the Maykrs and the Sentinel Priests who discovered and unlocked the true power of the Essence." -Dr. Samuel Hayden
DEMONIC PRESENCE
Performing the act to damage a Generator causes it to become affected by Demonic Presence
While Demonic Presence is active on a Generator, the minimum Regression before a Generator stops regressing requires 50/75/100% more Repair.
"Demonic presence detected!"
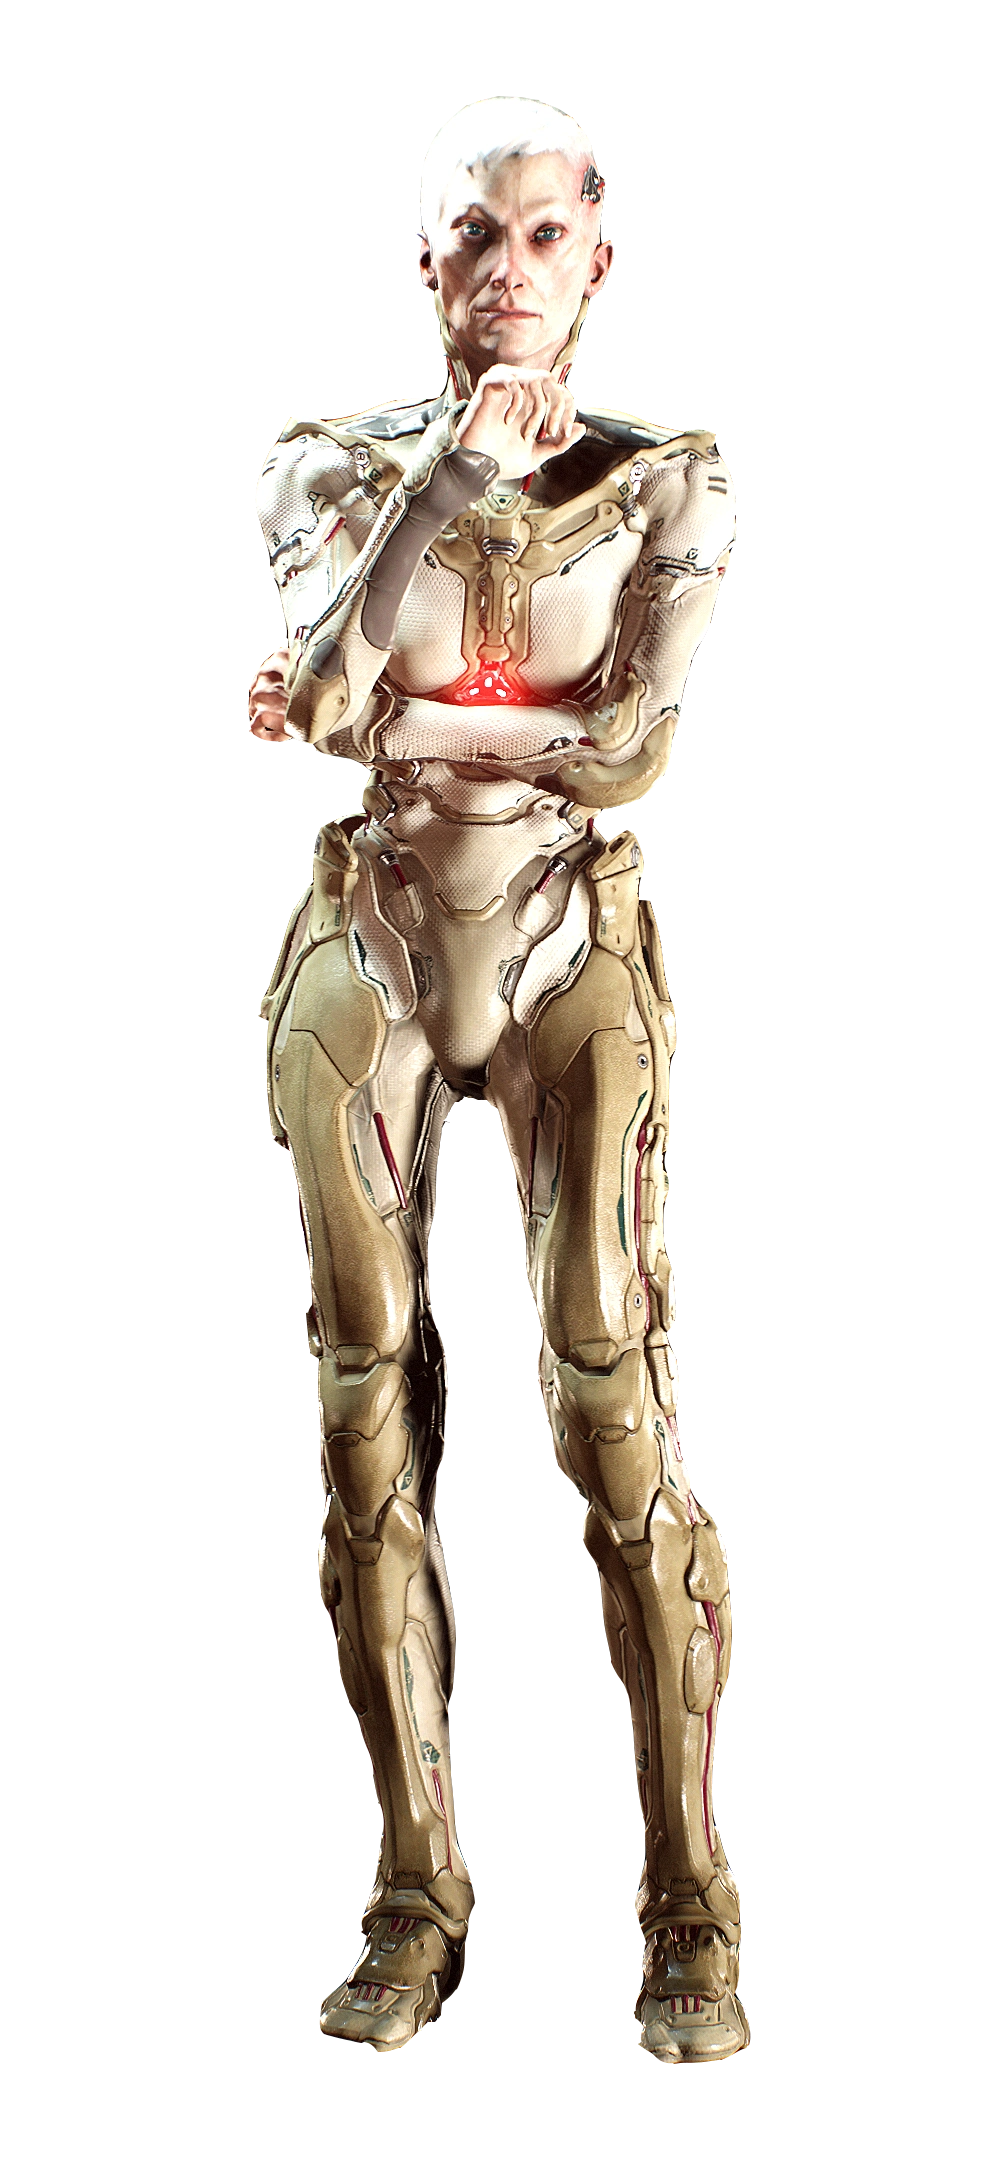
OLIVIA PIERCE - SELFISH CULTIST
A selfish cultist who's responsible for the massacre of the UAC and paved the way to the invasion of Earth. All of this so she could possibly become a god.
Her personal Perks Necessary Sacrifices, Boon: Hellwave, and Aranea Imperatrix allow you to suffer and succeed from being Cursed, benefit you and more importantly, yourself when someone is on the Hook, and perform just a small amount of sabotaging to gain personal benefits.
NECESSARY SACRIFICES
Destroying a Totem instead activates Necessary Sacrifices.
Upon cleansing a Hex Totem, gain a permanent 10/15/20% bonus to healing, repairing, opening, and blessing speeds however, you will eternally be Cursed by the effects of the Hex.
If you destroyed a Dull Totem, you instead gain a 5/10/15% bonus to the above for 80 seconds.
You cannot Curse yourself multiple times with the same Hex Perk.
Each unique Curse you obtain will add another instance of Necessary Sacrifices.
"I believe in honesty... especially now, in what will be your final moments in this world. All the rumors... the human sacrifices... the Hell portal... the demons... it's all true. My sisters and brothers, be thankful. You will be the first. You will have a seat alongside them as I will in what will become the new world they create for us. Starting now." -Olivia Pierce
BOON: HELLWAVE
Performing a 14 second interaction on a Dull Totem turns it into a Hex Totem.
Soft chimes ring out within 24 meters.
The effects of Boon: Hellwave do not occur until someone is on the Hook.
When someone is Hooked, the Boon Totem becomes Enflamed and cannot be snuffed by the Killer as well as nullifying any other Boon effects.
While the Totem is Enflamed, you gain the Endurance Status Effect and for 3/4/5 seconds after leaving
Additionally, you gain an un-stackable 7% Haste and for 1/2/3 seconds after leaving it
If you are Hooked within range of Boon: Hellwave, it will snuff itself.
For each time Boon: Hellwave is snuffed in this manner, it takes 4 seconds longer to Bless a Totem up to a maximum of the action taking 20 additional seconds.
ARANEA IMPERATRIX"This Hell Wave will redirect the course of mankind. On this day we make our contribution to their cause. Our salvation lies with them!" -Olivia Pierce
Performing the following actions grants a Token:
- Having another Survivor take a Protection Hit for you
- Performing an Unsafe Hook Rescue
- Failing a Skill Check while cooperating on a Generator or when healing a Survivor
Upon obtaining 6/5/4 Tokens, Aranea Imperatrix activates
Each Great Skill Check is worth 8/9/10% more and Skill Checks as a whole are 10/40/50% slower and have a 20% larger Great Skill Check zone.
"Thank you for your service. May you rot in Hell." -Olivia Pierce
MORI - "GLORY KILL"
The Marauder smashes their right boot down on the Survivor's left leg as they turn onto their back. The Survivor's leg is completely crushed to a pulp from this action.
Seeing the worm writhe in pain, The Marauder then takes his Axe and swings it downward at the Survivor's left arm, cutting it clean off.
The Marauder then un-holsters his Super Shotgun and points it at the victim's face.
The Survivor puts their hand out and blocks their face, but The Marauder pulls the trigger, turning both the hand and head into an unidentifiable pulp.
The Marauder then lifts his boot and grabs his axe before control is resumed.


